Showing posts with label Thanksgiving. Show all posts

Saturday, November 30, 2013

Thanksfuls 2013

 I'm thankful for my Lil Man. Spidey is the best son in the world. I'm thankful for his smiles and the thousands of times he cuddles with me. I'm thankful for the {patience} he teaches me. I'm thankful that he has red hair because it is freaking adorable. I love this wonderful 'man of the house' we get to have.
 I'm thankful for my princess. Petey is such a vibrant, smart little girl. I'm thankful for the lessons she teaches me. I'm thankful for her kind heart and her example to me. She is constantly teaching me how to love others more. She isn't 100% selfless but she is more selfless than any other 5 year old I've ever met. I am so glad this special, sweet, blue-eyed princess is mine forever.
 I'm thankful that my kids have a good dad. I'm thankful to know that they love and look up to him so much. He is a wonderful dad and I don't regret bringing those two perfect babies into this world with him. He has taught me a lot these past 7 years and through the sadness I now face, I still don't doubt that he is a good father to those precious kiddos.
 I am thankful for each and every one of the people in the above picture. My family is wonderful. My sisters and brother are wonderful. My parents are extremely supportive and are always willing to do whatever I need. They give me so much love and have raised me to be the person I am today.
For this last one, I had to put a silly picture up to keep my crying to a minimum. I'm extremely thankful for this girl. She is the best friend I could've asked for during this time in my life and I plan on being her friend forever and ever. She watches my kids ridiculously often, she is always there when I need to talk, and she tells me to truth. Sometimes I don't like to hear it but I always know she's right---did you catch that, Lacey? That's the only time I'm going to admit it.
Heavenly Father placed Lacey in my life for a reason. I don't know if she realizes the importance of her being where she is today. They moved in last year and months later, we became almost instant friends. I had been lonely for a long time before that and hadn't felt a strong friendship and she just barged right in my life and showed me what friendship should mean. I am forever thankful to Lacey.

I'll stop there so I don't sound too uber obsessed with my friend but just trust me---she's the best.

Thanksgiving was so special this year and I'm so incredibly grateful to my Heavenly Father for making it a year to remember.

When asked what I was thankful for this year before we sat down to eat, the first thing that came to my mind was this:
I'm thankful for the ability to be happy, no matter the situation.

And that is so true. I am thankful to know that I control my happiness. I'm thankful to be a mom. I'm thankful for food to eat and for the people that surround me daily.

I am so blessed and I love it.

Friday, November 25, 2011

Thanksgiving

I have so so so SO much to be thankful for.
First and foremost, this cute guy right here. (Don't we look so young here?) He is THE BEST. He cooks, he helps with the kids, he goes to school full time, he works when he can, and he loves me so much.

My children. They love helping each other and they are super adorable. :) I am thankful to be their mom and get to stay home with them. I really lucked out with these two.

My sisters. I have 4 sisters and I LOVE it. They are my friends and we have so much fun together.

My in laws. My kids LOVE their Nana and Papa. And Nana and Papa love my kids. They are always doing special things for them, watching movies with them, and letting them have treats. :)

The many cousins and second cousins and others who entertain my kids. It makes my heart happy to see others interacting with my kids and treating them well. I know they will grow up feeling loved by so many people.


Yesterday for Thanksgiving, we spent the day with my parents and 4 of my siblings (we missed you, Karin!).

I am thankful for my parents' neighbors who have geese and chickens and let our kids play with them (Notice Bubs uptight shoulders. He didn't like the geese very much.).

I am thankful for Grandma's who write the exact name that my girly requests to have on her cup. "Mahayla Noelle Princess Maughan." (She really believes that is her full name.)

I am thankful for traditions and watching the Macy's Thanksgiving Day Parade.

I am thankful for husbands who let wives nap for 3 hours on Thanksgiving. Notice the hospital tag? I was in the hospital the night before because I thought my appendix had burst. Apparently, when a REALLY big cyst bursts, it can make you feel like death has arrived. But I'm ok now. Just tired.

I am thankful for big cousins helping little cousins go outside to play on the swing set.

I am thankful for Grandpa's who make life fun for their grandkids.


I am thankful for silly...

...monkey children. :)

I am thankful for a husband that cooks.

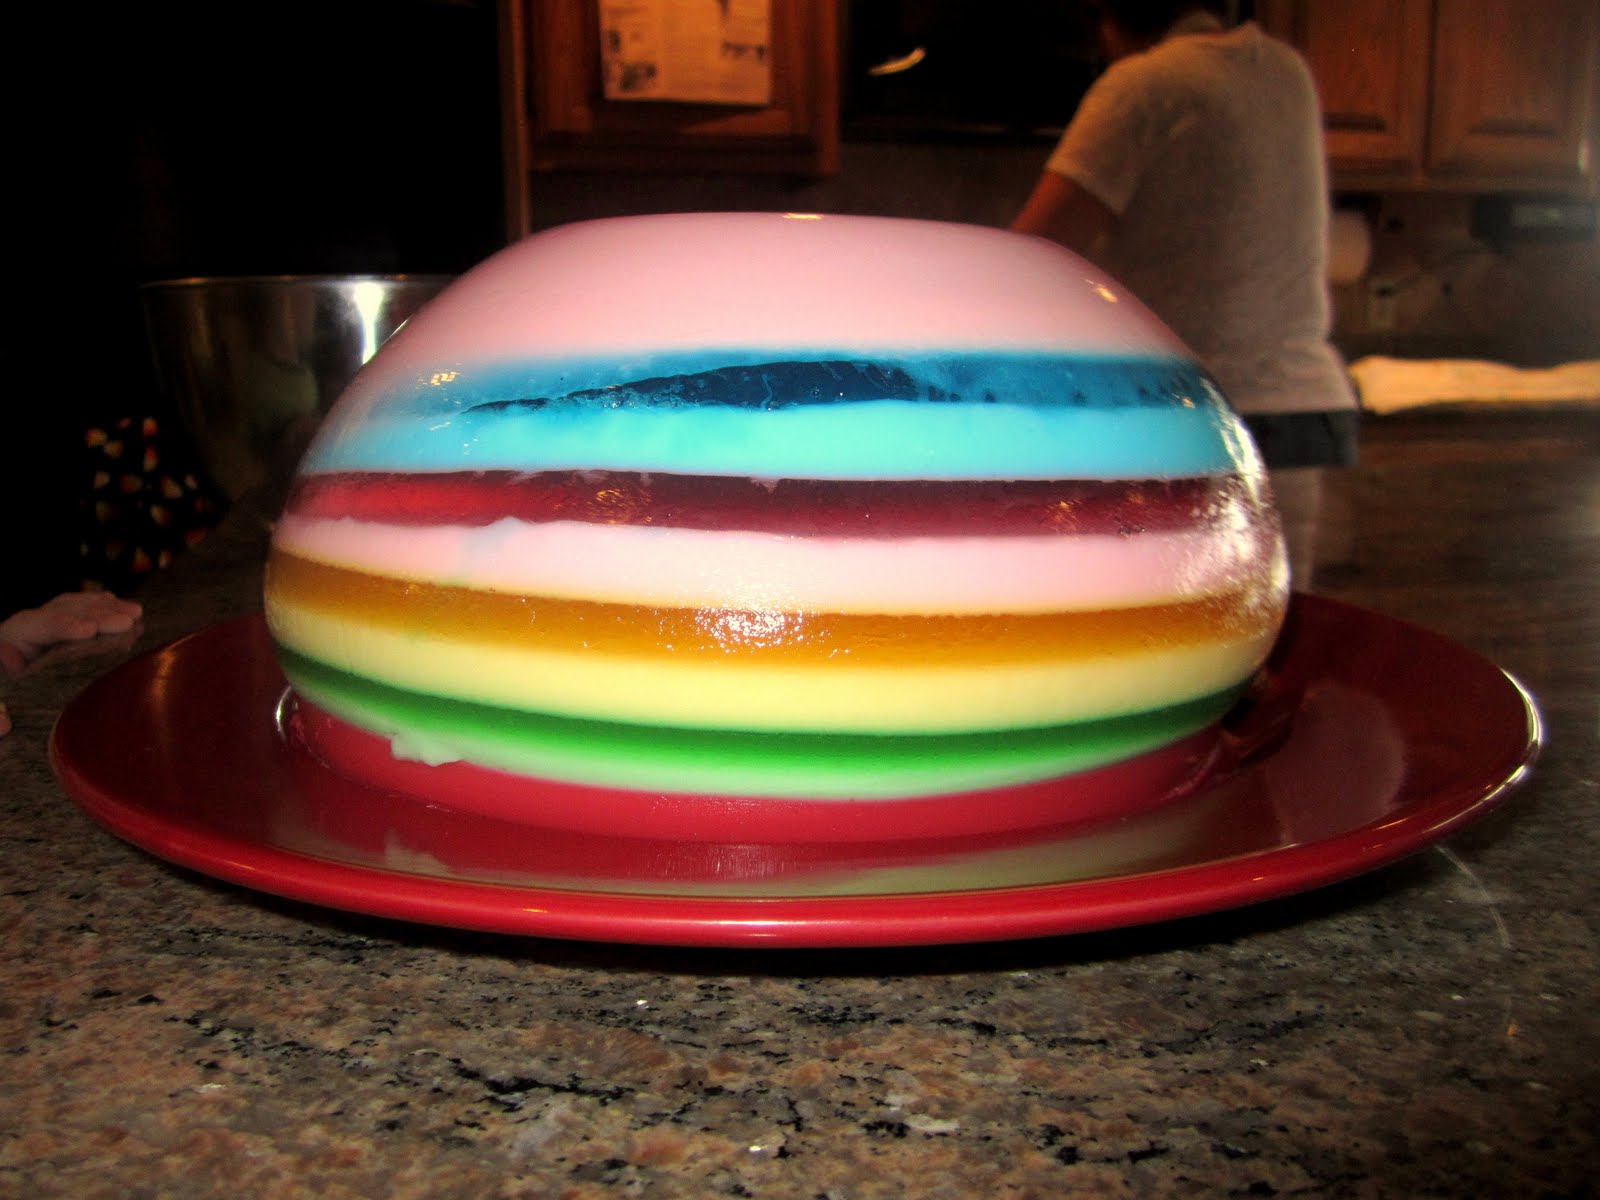
I am REALLY thankful for a husband that cooks. I didn't make ANYTHING for our feast but Boss made sweet potatoes with candied walnuts, layered jello, and helped with the turkey. That's my man!

I am thankful for a son who loves to toss around a football on Thanksgiving with his momma.

I am thankful for a tired boy at 4pm who fell asleep 5 minutes into our Thanksgiving dinner. Such a silly, sweet moment.


Thanksgiving was amazing. We missed our Maughan family but were thankful we got to spend time with our Guthrie family. We love you all!


And that's how thankful Suze is.

Tuesday, November 23, 2010

Cork Screw Bows and Leaf Garland

Since the leaf garland tutorial is so easy peasy, I thought I would combine another fun tutorial in there for those of you with little girlies.

Things you will need for the leaf garland:
  • fake leaves (I got mine in the $1 section at Target)
  • needle and thread

First, I strung each leaf onto the thread, sticking the needle through the leaf in two places so that it fans out and doesn't go sideways.

Then just keep stringing until you have the length that you want. I didn't put my leaves in a pattern but just strung them on randomly.
And then I strung them across under my "GIVE" letters.
Now onto the cork screw bow tutorial. I have loved making these for my daughter!

Things you will need for cork screw bows:
  • ribbon (preferably 1/4 in wide)
  • metal skewers (I used metal chopsticks...anything oven safe is fine)
  • bobby pins or clips (also something oven safe)
  • thread
  • hot glue gun
  • scissors
  • alligator clip
  • oven

First you want to preheat your oven to 250 degrees. Then start by clipping the ribbon at the top of the metal skewer and wrapping it around the skewer. I wrapped my first few really tight and they were too tight. The second time I did it, I wrapped in an even spiral and they turned out a lot cuter. Cut off the ribbon at the bottom and clip it to the skewer.


Put your ribbon skewers on a pan and put them in the oven for 20 minutes.
When you take them out, let them cool completely before unwrapping them from the skewers.
I cut mine into thirds before making them into a bow. They were each about 3 inches long.
Then line them up, put a piece of string in the center and tie the middle. They will pop out and go every which way which is what makes these bows so cute. I also tied a piece of ribbon in the center to hide the white thread that I used.
Attach it to your alligator clip and you are all set.
And that's how Suze crafts it!

Thursday, November 4, 2010

Thankful Banner and Wooden Letters

I have TWO tutorials for you in this post. Feeling lucky much? But first, I have some exciting news about this week.
My first news was Tuesdays dinner. I made chicken bake and mashed potatoes and Mmmm, it was good! Even ask my friend, Candice. I'm pretty sure she liked it too.
My second piece of exciting news involves a little chubby guy we like to call Spidey. He is officially trying out the view from up here with the rest of us! He can take 5 steps in a row and is practicing and trying hard to get more in there. I'm so proud of this little guy. Today, he just stood and stared at me for 30 full seconds. Go Bubs!
Now onto your tutorials. Tutorial # 1 is for mod podged wooden letters. I am doing a word for each month and they slide right into a wooden hanger on my wall.

This month, for Thanksgiving, I chose to do the word Give. I went to my favorite store and picked out some cute scrapbook paper and got to work!
You will need:
  • 2 different colors/patterns coordinating scrapbook paper
  • mod podge
  • wooden letters
  • scissors
First, I sized each letter and added about a half inch around all of the edges before cutting out a square of the paper. Then, I applied mod podge to the tops of my wooden letters and layed them on my pieces of paper.

You dont have to do this, but I found something heavy and layed it on top of my letters to make sure they would have no bubbles in them.
When they were dry, I turned them over, cut a bunch of slits all around each letter, and wrapped the paper around to the back of the letters, securing it with mod podge.
Last, I mod podged the tops of the letters over the paper so they would have a glossy finish.

And here are my letters, all festive and ready for Thanksgiving. :)
Now onto tutorial # 2. I have seen these banners going around and thought I would try it out and make my own. I chose to use the word Thankful for this one.

You will need:
  • 5 different colors/patterns of coordinating scrapbook paper
  • brown tulle
  • a printer (and printer paper, of course)
  • mod podge
  • a glue stick
  • scissors
  • paper cutter (optional)

First, I printed off the word Thankful in the size and font that I wanted to use. I made sure to use black ink so I could see the print through the back of the printer paper. I cut out each letter and glued it to the back of a piece of scrapbook paper. I then cut out each letter again so now it was connected and all I could see from the front was the marroon scrapbook paper I chose.

Then, I used my other coordinating scrapbook pages to cut out squares in two different sizes-one size barely bigger than my letters, and the next size barely bigger than that. I wanted my squares to have a slant so I matched each one up and cut diagonally into them.
I mod podged all of the papers to each other (included the letters on the front) and waited for them to dry.
After they were dry, I hole punched each sqaure on both top corners and tied them together using the brown tulle.
This is probably my second favorite craft so far, aside from the yarn wreath. :) I love the way it looks hanging on my wall above my cute turkey and my favorite pictures. (that's my favorite wall in our house)

Good luck! and Happy Crafting!
And that's how Suze sees it.

Wednesday, November 3, 2010

Felt Turkey

I am feeling pretty legit tonight in the craft department because for the first time, I didn't use a tutorial I found online! I made something up on my own.
Lately, I've been weird and have been trying to save everything I can and reuse it for some sort of craft. So of course when we ran out of paper towels---I just had to reuse the cardboard cylinder!

What you'll need:
  • empty paper towel roll/toilet paper roll
  • different colored felt
  • brown scrapbook paper
  • hot glue gun
  • mod podge
  • little beady eyes
  • orange or brown yarn

First, I mod podged the scrapbook paper to my paper towel roll and let it dry.

In the meantime, I cut out feathers for my turkey with felt. I actually ended up cutting more than this, as you'll see in the next pictures.
I hot glued each feather to the back of the paper towel roll and glued on the eyes and a triangle piece of felt for a beak. And as you'll notice, I cut the paper towel roll down because it was way too long (hence the reason you can use a toilet paper roll too).
Here is what it looks like from the back. Not very neat at all.
Then I realized my turkey was very top heavy so I looked around for something to glue him onto. Luckily for Mr. Turkey, Petey had gotten into my make up earlier that day and had ruined my entire case of blush---but I'm glad I held onto the tin case because I found Mr. Turkey a new home! I just hot glued him onto the tin case.

Then I realized how dumb my turkey looked with a black metal case so I decided to hide his home with orange yarn. I just hot glued the yarn in a circle over and over and over again!
Then, I bunched up some individual pieces of yarn...
...and stuck them on top of the wrapped yarn. Doesn't it almost look like a nest for my pretty turkey?
I have lots of crafting tutorials to show you so look forward to more crafts ahead!